
Yamaha Ham Radio Installation
Yamaha Ham Radio Installation
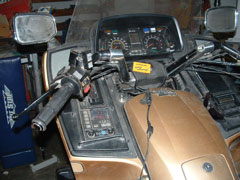
When I had the radio removed for other repairs/modifcations I couldn't help but notice an extra connector for the factory CB radio that was not installed on my unit.
I decided to search the internet for a pinout on this mystery plug; would you believe I came up absolutely dry.
Time to figure it out the hard way. Armed with a multi-meter, an oscilloscope and more brass than brains I dug in.
First was to figure out the pin-out of the factory plug in the tuner. Some were easy and some were decidedly uneasy.
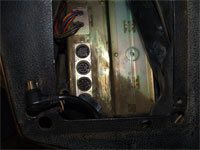
This is what I found. This is for the techno-geeky who may want to dabble themselves. Don't forget to read the BIG DISCLAIMER!!!
(pic has been updated: confusion ceated from my hyrogliphics on the lid of a cardboard box, that made sense at the time.)
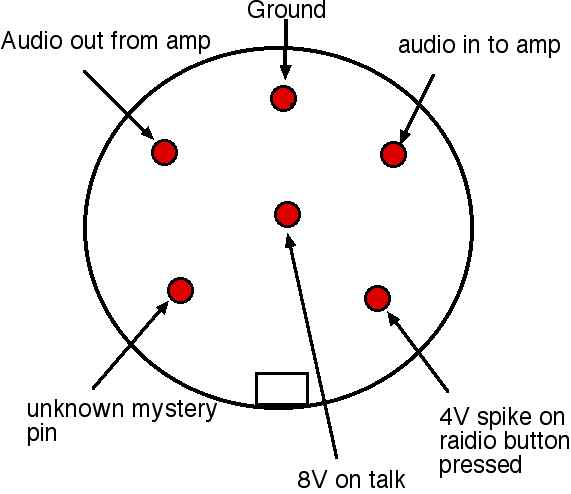
That 8 volt on talk supplies 8 volts DC any time you speak loud enough to mute the radio. A handy feature but I did not use it at this time. There could be some future expansion here.
The 4 V on radio button pressed gives a 4 volt DC spike for about a second when ANY button on the radio or the seek button on the handle bar is pressed.
The unknown mystery pin....This pin sits at 0.05 volts. I believe the original engineer put this pin here to drive future delusional mechanics insane. Kudos! It works great.
(Update: according to a reliable source, the CB puts 6V on the mystery pin to mute the radio.)
In the end the only pins I used were the audio in, audio out and ground.
My dad was kind enough to go digging through his boxes and find me a 6-pin din connector. With a bit of cutting down it was installed and more importantly short enough that the stereo could be installed!
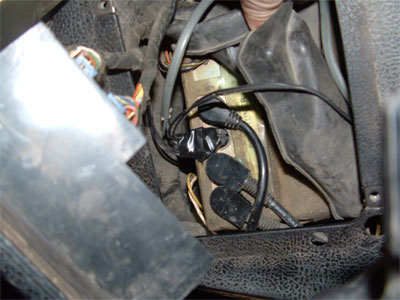
Now just to find a home for my ham radio. The best spot I could find is by the over flow tank. Where the CB would be if it was there.
 One battery for the hand held had gone bad in 1992 and I just did not get around to throwing it away so I cut the battery case down and wired it into vehicle power.
And here it is all tucked in.
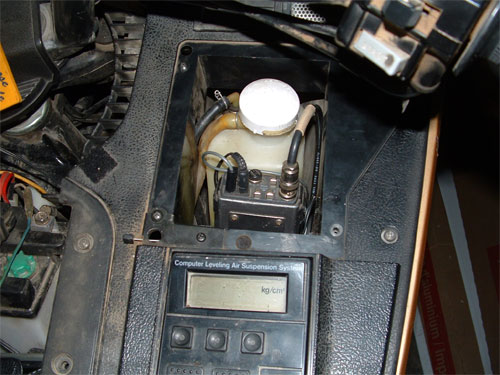
 Note that the factory cover goes back over top to conceal and protect.
The next obstacle to overcome was control as it did not seem practical or safe to be trying to dig in there at 100kph.
Through some research I found that you can trip the push to talk (PTT) by a resistor from the mike pin to ground. This was then done by a switch that changes the seek button on the handle bar to a PTT on demand.
Whew! I'm getting long winded here and I'm typing my fingers (both of them) to the bone.
OK, last part of this project, I promise.
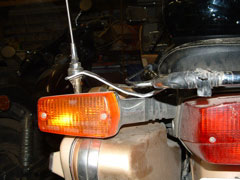
The antenna. A trip out to some of my dead vans might be of some help here. With antenna scavenged I quickly returned to my heated shop. The antenna was then shortened to a quarter wave and the coax was then tied in. Just a small matter of mounting it.
I had a nice piece of flat iron that I should have been able to bolt to the bike and have it come straight out, but due to catches and hooks it had to have some slight arcs put in to it.
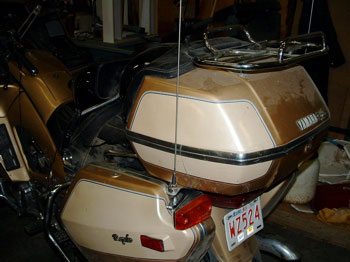
And there you have it. Isn't it simple.
